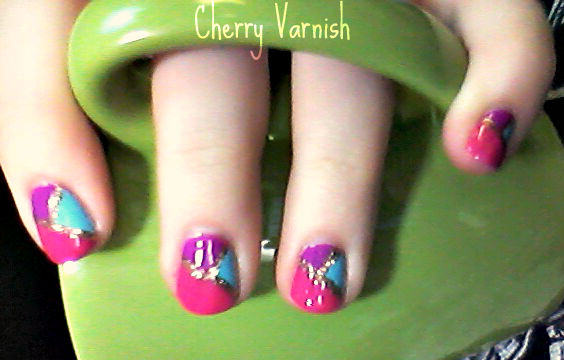
A wonderful lady in a Facebook group I am in brought up a fairly well-known Youtuber that does nail-art tutorials, and love several of the designs. Having heard of the Youtuber, but not the specific design the gal was mentioning, I watched the video and was inspired not by the same art; But the following one. [The 3rd] I had a failing mani in its final hours of life, and rather than remove it decided to USE it, and save myself a ton of time while trying out the new nail-art. And it worked! I ended up with a fantastic 'recovery' mani, AND got to try out my Plie Wand's striper tool! [Spoiler: I LOVE IT!] Please note: While I was originally inspired by the Youtuber mentioned, my design is NOT a direct replica. As I was doing this, I felt drawn to go a slightly different direction, and I love where I ended up. Maybe someday I will truly replicate the design I liked, but that day was not today. What you'll need!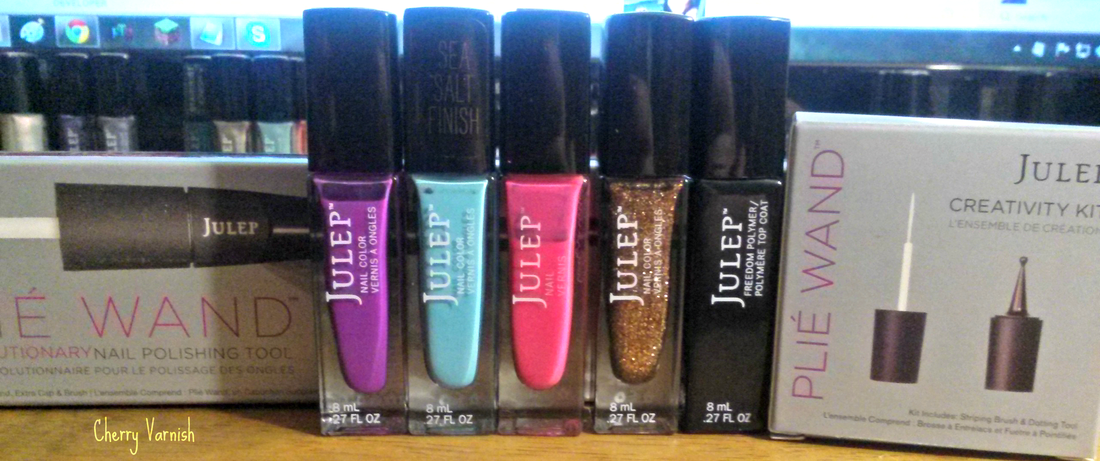
Step One: The dying mani [Flora]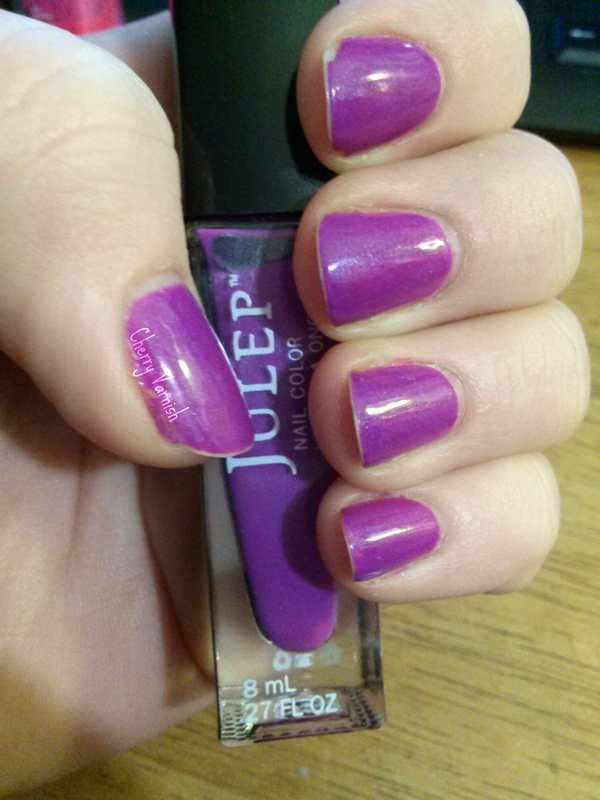
If you're doing a recovery mani as I did, you will likely already have a base coat, colour, and layer or two of topcoat on your nails. If not, this is the step to add all but the topcoat! If you're concerned the topcoat will affect the nail art, you don't necessarily have to worry. However, you can lightly wipe some remover that has been weakened with a little water [VERY little!] to remove some of the topcoat. 1-2 swipes at most, in an even manner to prevent streaking and thin spots. :) Step Two: The first colour [Kai]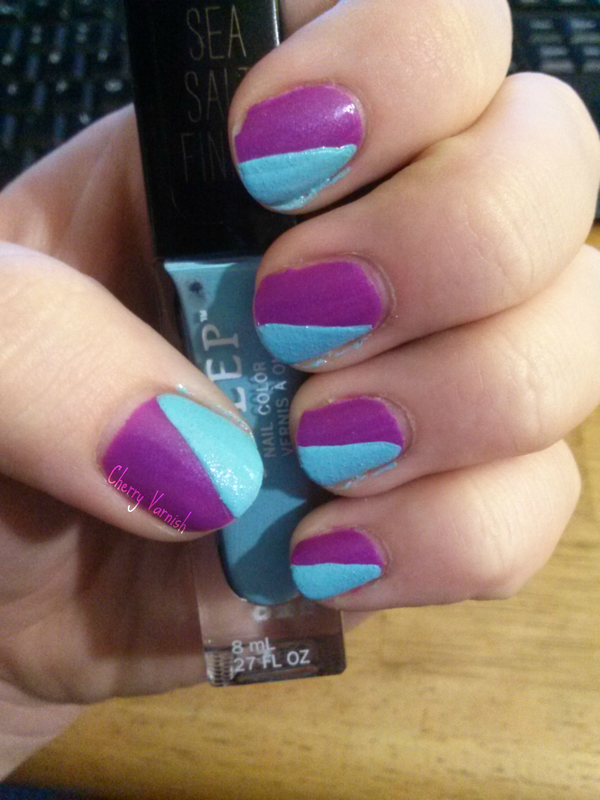
I wanted a pale blue to contrast the darker violet of Flora, and Kai was the perfect colour. Because she is a sea salt texture, I wanted her as far down the line of layers as possible, so the texture would be less prominent in the final product. So, she's the first colour! I went for an almost half and half diagonal swipe here. :) Step Three: The second colour [Lauren]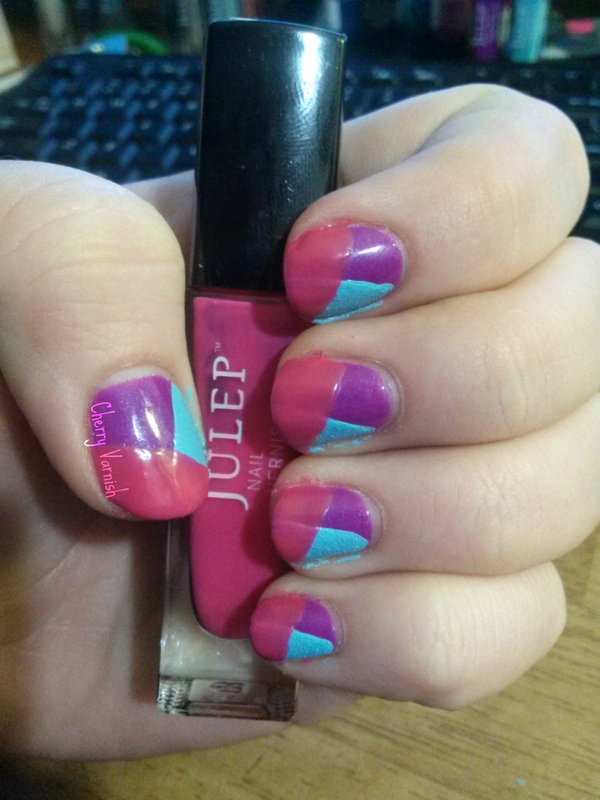
For my second colour, I needed something from the warmer colours to bring a little balance back to the mani. Opting for a neon pink [Not the calm-pink it appears in these images] with Lauren my only regret was that I didn't add a third layer OF Lauren to even out the sheerness some more. Instead of matching the angle of Kai, I started halfway down the nail and gently curved to the tip of the opposing edge. Step Four: The details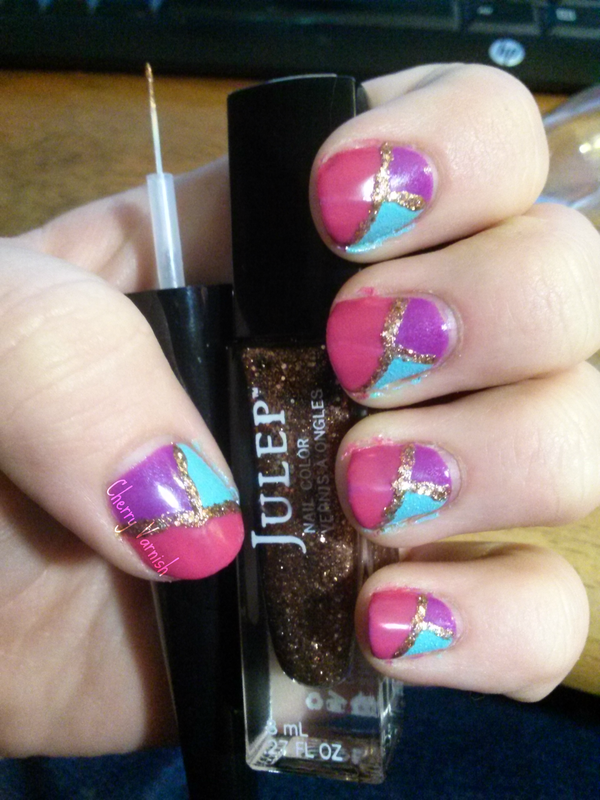
With my beloved copper glitter, Diamond Theory, and Julep's striping attachment for the Plie Wand, I lined the edges of all the colours with a single layer of glitter. I dipped my polish-brush in the polish, and dabbed the excess onto a plastic art tray, which I then used to pick up polish on the striping tool. A quick wipe with remover and my tool was clean! I was actually QUITE impressed with how well it performed! Step Five: Finishing touches <3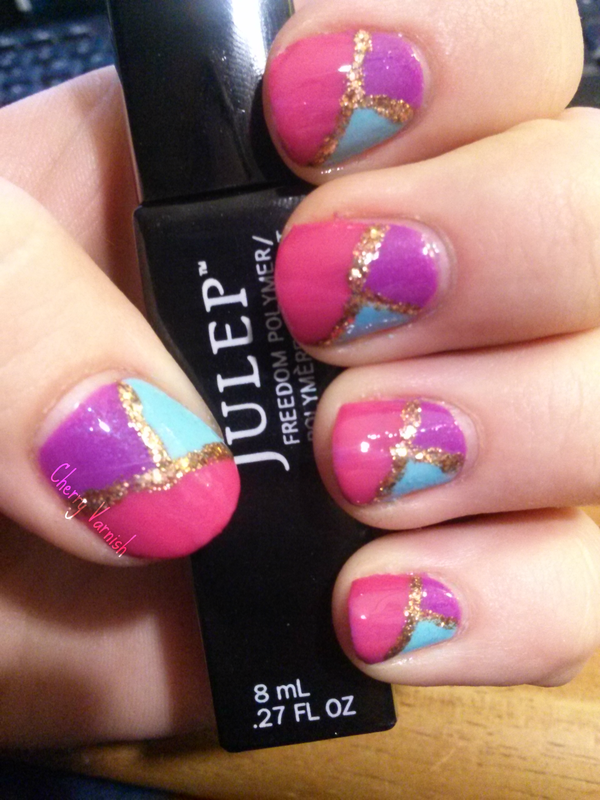
After my edge cleanup [Gotta love orange wood sticks soaked in remover!!], a single layer of Freedom to fuel my high-gloss finish fix sealed [and dried!] this beautiful recovery in minutes. You can't even tell this was a re-used mani! <3
0 Comments
Today, that IS the question. I had a surprise question waiting for me this morning, and I definitely wanted to address it. [Reminder: Just my opinion and experience as a beauty representative and user. I'm no guru, but I've been doing it a long time and have spent as much time as I could researching different avenues prior to doing things myself for personal testing. I would not, and will not, advocate ANY beauty regimen I feel unsafe or unsanitary or that I have not personally tried and tested regularly for problems.] I was asked, "Do you buff? I see a lot of people talking about buffing, but I'm not sure exactly what it is or how to do it or anything pretty much. I'm so new to this. Do you have any information about it?" My answer: Yes! I do have information! Personally, I only buff when I need to. Over-buffing, contrary to some beauty guru advice, IS detrimental to nail health overall. You CAN buff too much, and the result is not pretty. First, let's address "What is buffing?" for those that have absolutely no experience with it. Buffing, much like it sounds, involves various stages of filing down the nail plate [That is: The nail surface] with a small [usually spongey] block with attached sandpaper like surfaces. You start with a higher/rougher grade side, and remove the vertical ridges many of you might have seen. [Nails naturally have lines from the tip to the Eponychium/cuticle area, look closely and you'll see them. :)] You move to smaller and smaller grit until you reach a slightly quilted-looking side, meant to "buff" the nails, or give them a polished shine. Second, let's address "What COULD happen?". You COULD, in over-buffing, thin your nail plate severely. Sometimes, this can be SO severe you expose the nail bed underneath, which can be extremely painful, as well as dangerous. Nails rarely ever fully recover from this condition, as it creates an ingrown-nail of sorts. You could also thin the plate to the point of creating extremely thin, flimsy, flakey, and brittle nails that peel very often and bend and/or break constantly. Third, "So why would we want to buff? When SHOULD we? What are the benefits?". Benefits vary; But much like cleaning clogged pores, it can be healthy to buff away a thin layer or two, to remove harmful bacteria prior to smothering with polish. A light buffing can also give a slightly more jagged surface [Not dangerously so, just enough to give more surface on the nail than actually exists] for polish to better adhere to [Just be sure to clean with a cotton ball and polish remover, or rubbing alcohol, to pick up the nail dust BEFORE applying polish!]. I mentioned that I, personally, rarely buff. How do I know when to? I most commonly buff when I see this: 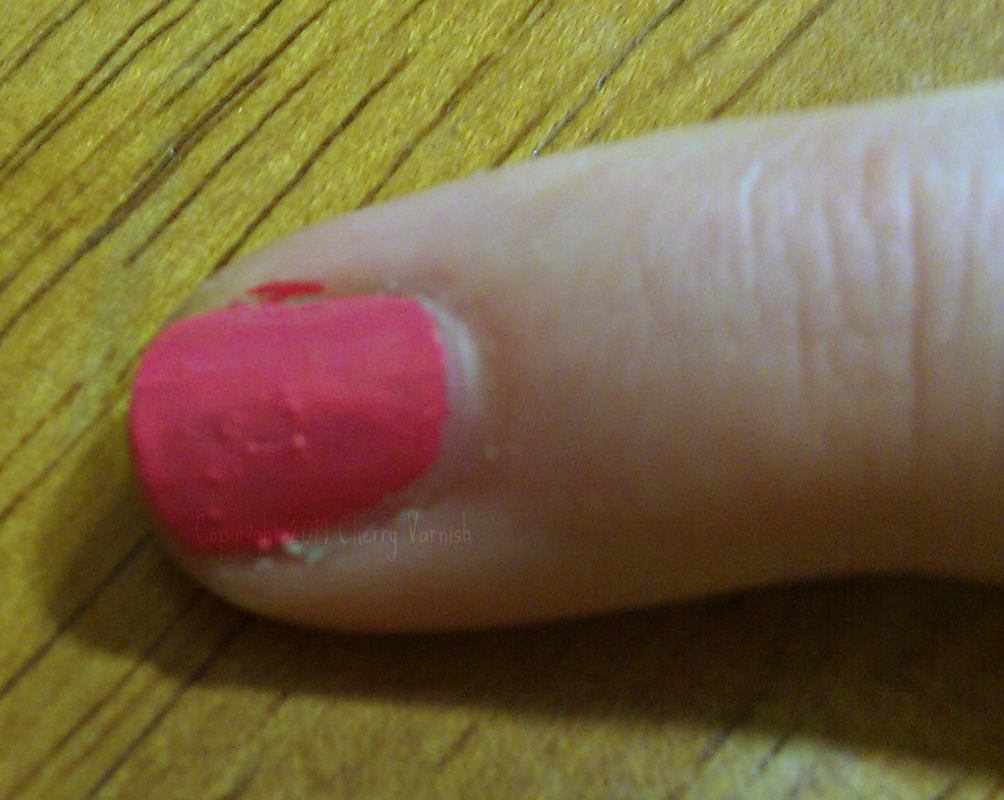
Polish applied to highlight focus point
What you see is the result of nail polish that has been picked off [Yes, a bad habit I know ;)]. The polish had adhered so well to my nail plate, picking/pulling it off pulled up strands of my nail plate. Much like string cheese, or pulling bark off a sapling, once a strand starts, pulling it will only bring it to the edge it's closest to, which can cause further damage. Light buffing, in this case, will close off those frayed pieces, giving me a smoother plate for polishing, and a healthier plate overall. Its also in this case, in my experience, polish HELPS to protect the nail. It creates an airtight barrier to keep bacteria out of the frayed openings, though they are small; And it creates a relatively thick shield to prevent further damage by external means. :) There are, of course, other times when it might be necessary; The most common reason I see buffing happen is to aid in Ultra-shine results. I will do this sometimes as well, but not if I have buffed in the last 1-2 weeks. Do you buff? Or do you not? What reasons do you have either way? I'd love to hear!  Want the best and latest in hand health and care? Click the button below to get your own Manicure kit from Julep! Made of Sleek Black Teflon-coated Stainless Steel, these are durable AND sanitary. What's better? Not only are these the tools found in Julep's nail parlors, but these come packed in a cute, compact, zippered travel case!
|
Whut is?With this blog, you can expect to see reviews, impressions, tips, inspirations, deals, and more. If there is something specific you would like to see, don't hesitate to let me know! 
Instagram feedArchives
July 2020
Categories
All
|
 RSS Feed
