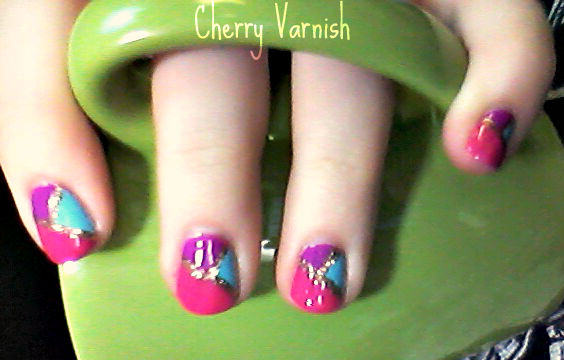
A wonderful lady in a Facebook group I am in brought up a fairly well-known Youtuber that does nail-art tutorials, and love several of the designs. Having heard of the Youtuber, but not the specific design the gal was mentioning, I watched the video and was inspired not by the same art; But the following one. [The 3rd] I had a failing mani in its final hours of life, and rather than remove it decided to USE it, and save myself a ton of time while trying out the new nail-art. And it worked! I ended up with a fantastic 'recovery' mani, AND got to try out my Plie Wand's striper tool! [Spoiler: I LOVE IT!] Please note: While I was originally inspired by the Youtuber mentioned, my design is NOT a direct replica. As I was doing this, I felt drawn to go a slightly different direction, and I love where I ended up. Maybe someday I will truly replicate the design I liked, but that day was not today. What you'll need!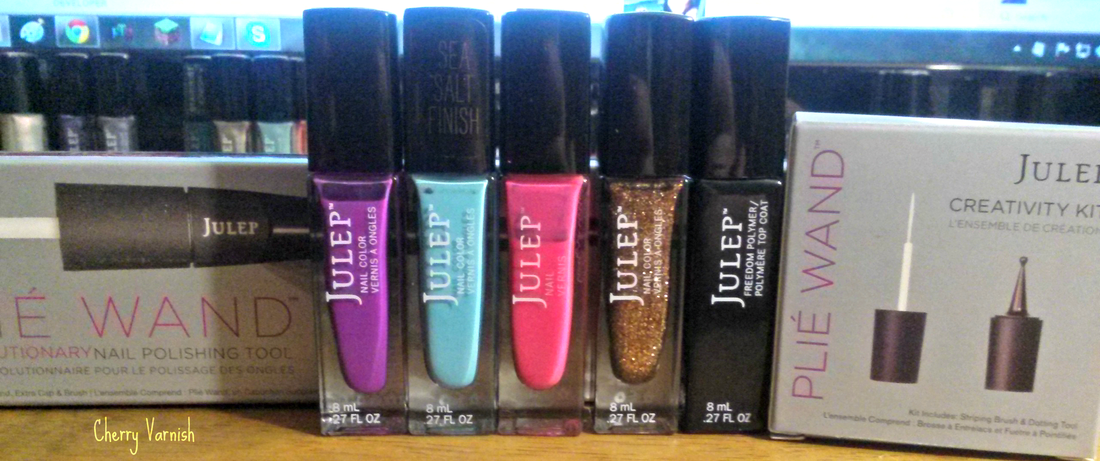
Step One: The dying mani [Flora]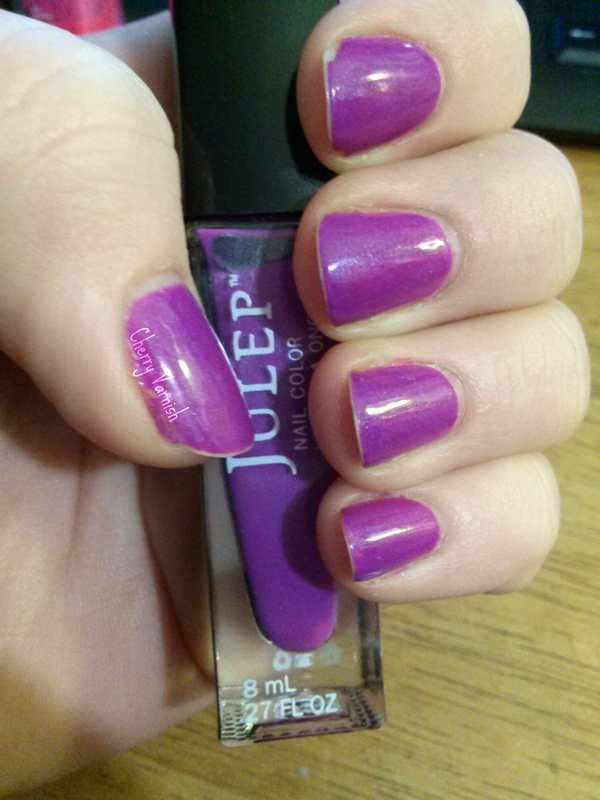
If you're doing a recovery mani as I did, you will likely already have a base coat, colour, and layer or two of topcoat on your nails. If not, this is the step to add all but the topcoat! If you're concerned the topcoat will affect the nail art, you don't necessarily have to worry. However, you can lightly wipe some remover that has been weakened with a little water [VERY little!] to remove some of the topcoat. 1-2 swipes at most, in an even manner to prevent streaking and thin spots. :) Step Two: The first colour [Kai]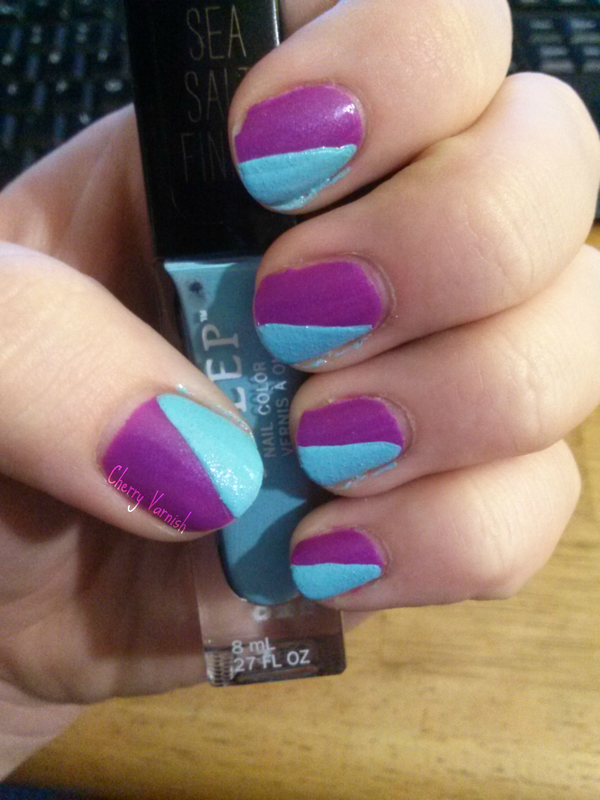
I wanted a pale blue to contrast the darker violet of Flora, and Kai was the perfect colour. Because she is a sea salt texture, I wanted her as far down the line of layers as possible, so the texture would be less prominent in the final product. So, she's the first colour! I went for an almost half and half diagonal swipe here. :) Step Three: The second colour [Lauren]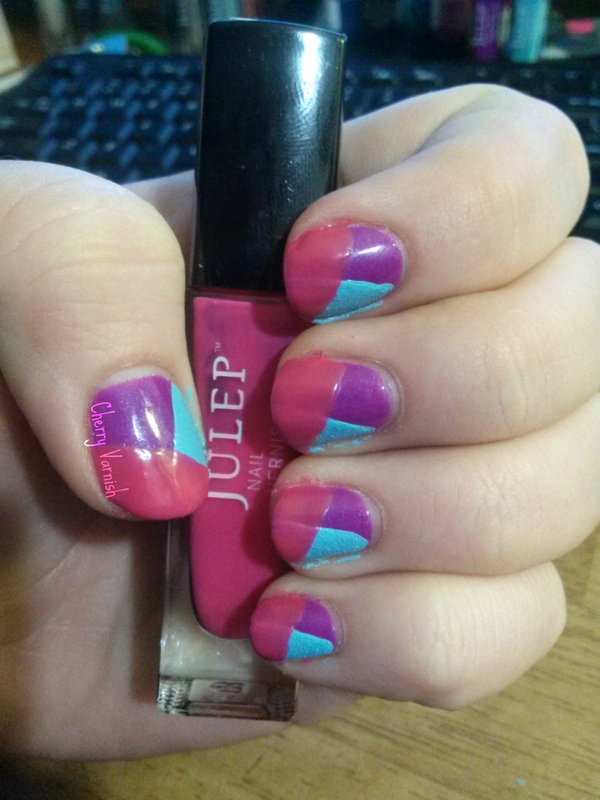
For my second colour, I needed something from the warmer colours to bring a little balance back to the mani. Opting for a neon pink [Not the calm-pink it appears in these images] with Lauren my only regret was that I didn't add a third layer OF Lauren to even out the sheerness some more. Instead of matching the angle of Kai, I started halfway down the nail and gently curved to the tip of the opposing edge. Step Four: The details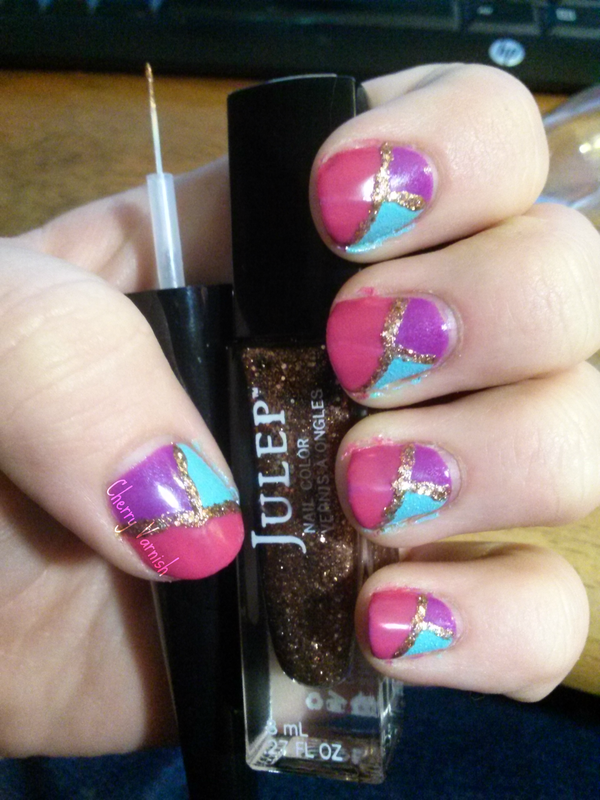
With my beloved copper glitter, Diamond Theory, and Julep's striping attachment for the Plie Wand, I lined the edges of all the colours with a single layer of glitter. I dipped my polish-brush in the polish, and dabbed the excess onto a plastic art tray, which I then used to pick up polish on the striping tool. A quick wipe with remover and my tool was clean! I was actually QUITE impressed with how well it performed! Step Five: Finishing touches <3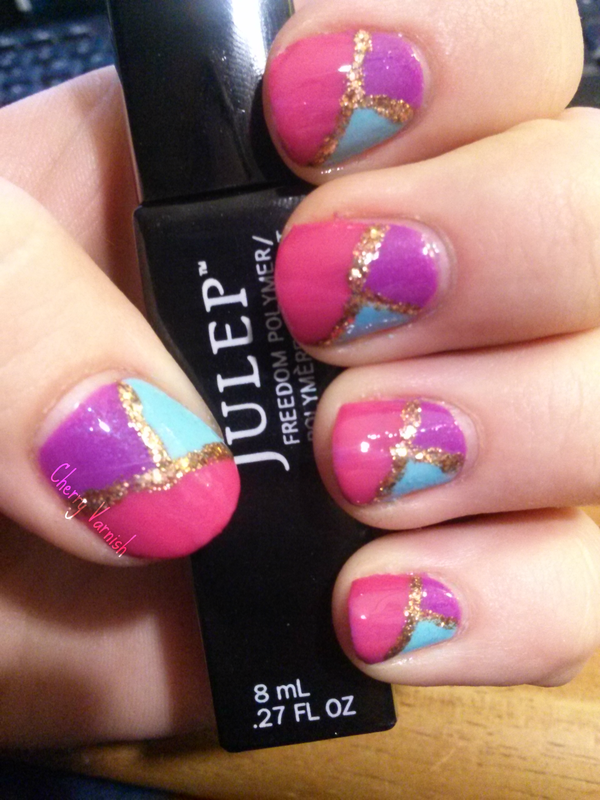
After my edge cleanup [Gotta love orange wood sticks soaked in remover!!], a single layer of Freedom to fuel my high-gloss finish fix sealed [and dried!] this beautiful recovery in minutes. You can't even tell this was a re-used mani! <3
0 Comments
Leave a Reply. |
Whut is?With this blog, you can expect to see reviews, impressions, tips, inspirations, deals, and more. If there is something specific you would like to see, don't hesitate to let me know! 
Instagram feedArchives
July 2020
Categories
All
|
 RSS Feed
